Enable 2x6inch Photostrip Prints
How to switch settings so you can print 2×6 photostrips or 4×6 postcards:
- Go to the Windows Desktop and type “printer” in the search bar.
- Click on Printers & Scanners (system settings)
- From the list, select the printer you’re using (DS620 or DS40).
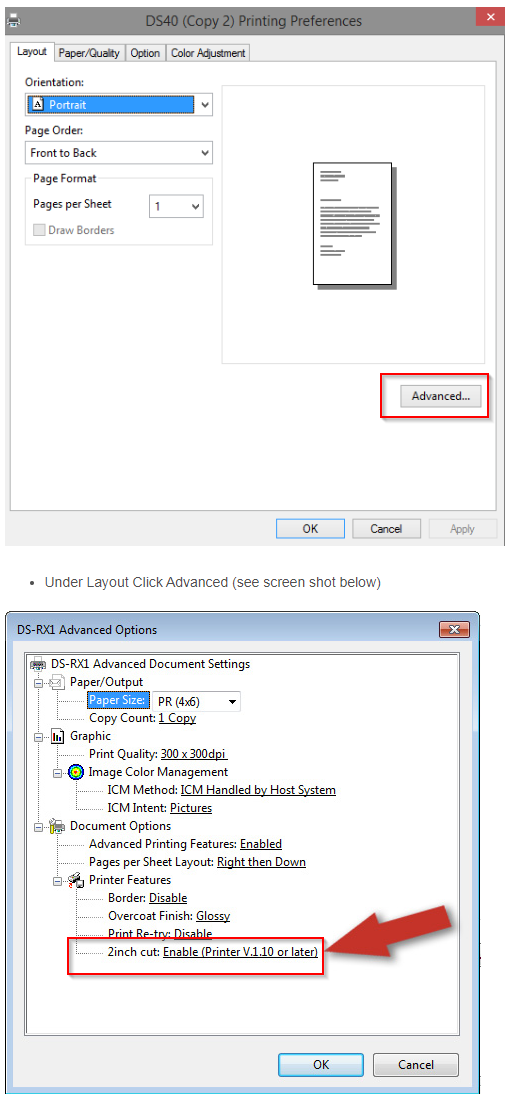
- Click on it and then click “manage” and select printer preferences OR Right click on it and select printer preferences
- Click on the “Advanced” button on the bottom right
- The last option should be 2 inch cut
-
- Enable: If you want 2×6 photostrip prints
- Disable: If you want 4×6 postcard prints

Brighten or Darken Liveview
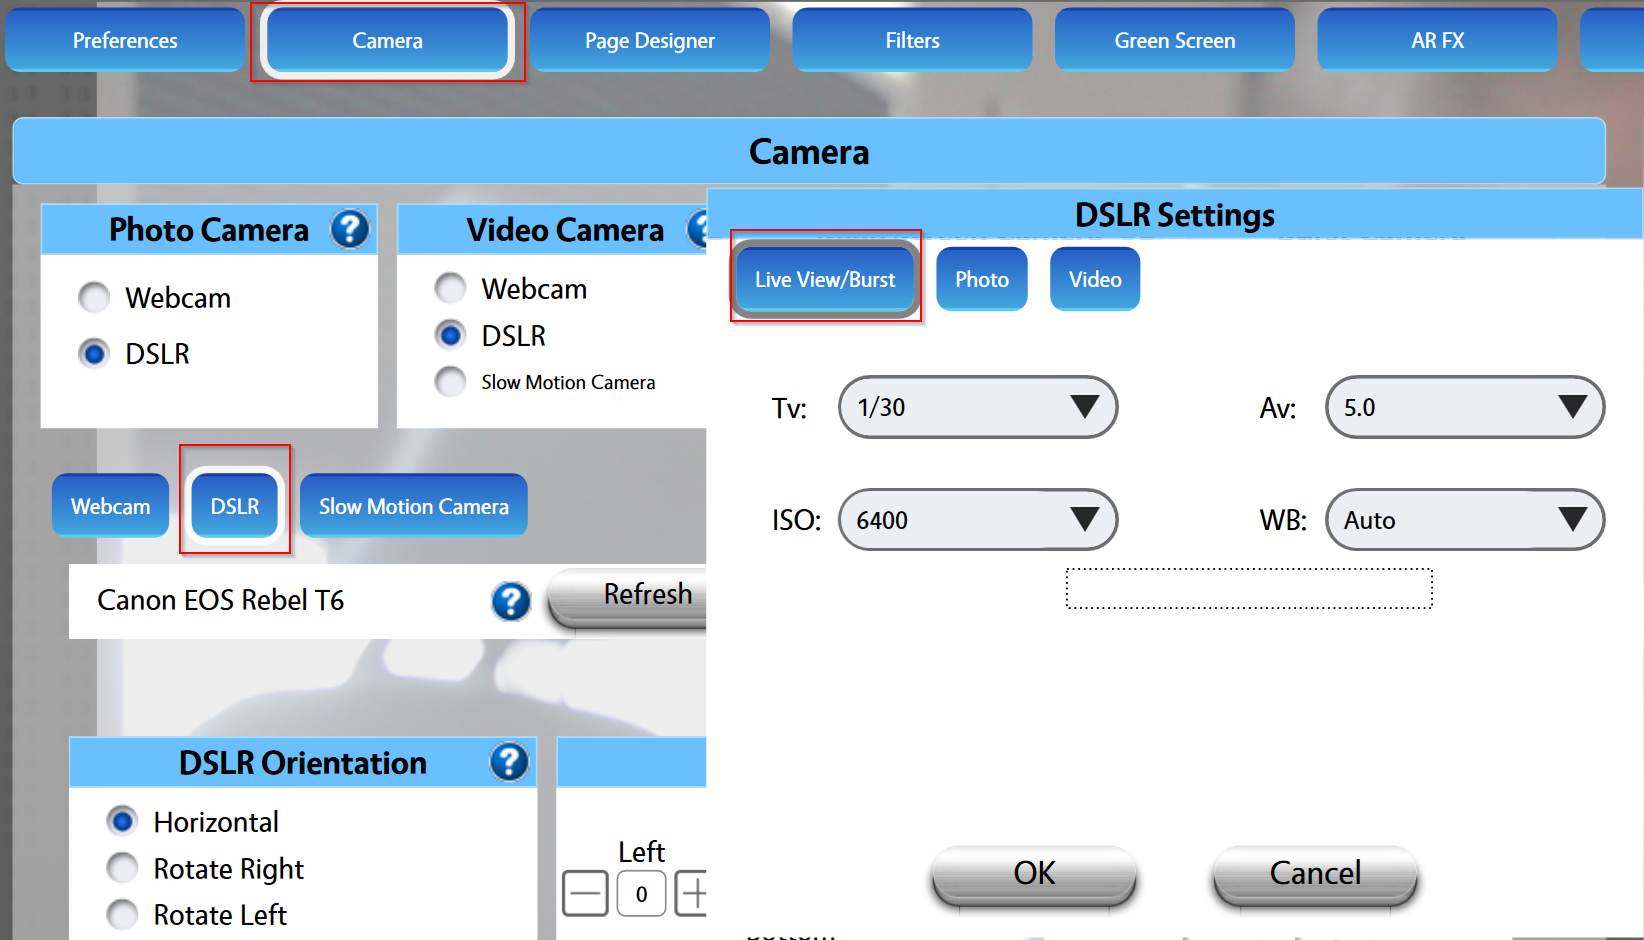
- Go to the Settings screen in PBU
- Go to Camera tab
- Click DSLR button
- Click Live View/Burst Tab
-
- TV: Denominator larger = Darker, Denominator smaller = Brighter
- AV: Number larger = Darker, Number smaller = Brighter
- ISO: Number larger = Brighter, Number smaller = Darker
Ex: Live view would be almost at brightest settings with TV: 1/6, ISO: 6400, AV: 4

Import PBU File
A PBU file will have all the designs and settings you need for your event. However, you’ll still need to tweak camera settings on your own.
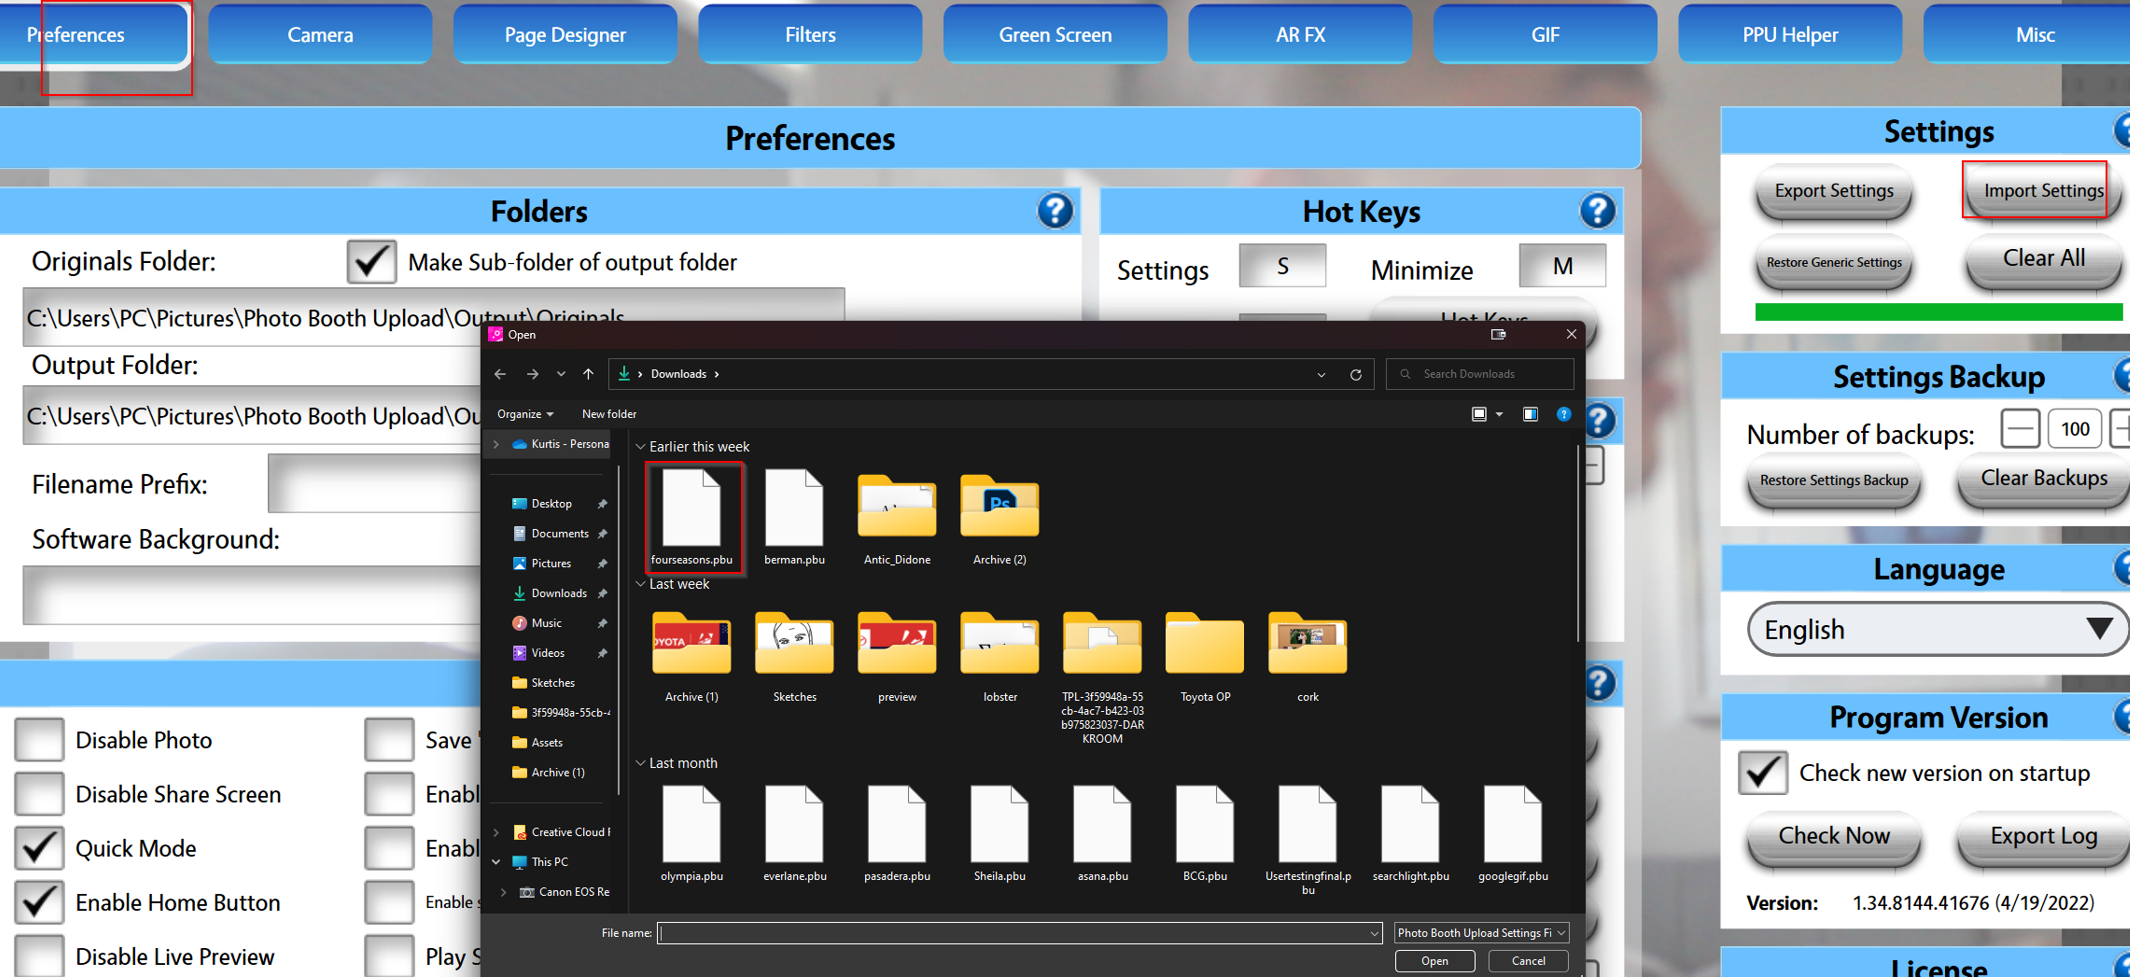
- Go to the settings screen in PBU
- Go to the Preferences tab
- Click on Import Settings on top right corner
- Select the PBU file you want to load, then click “Open.”
- PBU Import Settings screen will pop up. Just click OK at the bottom.
- Settings Imported Successfully pop up will appear. Click Ok.


